
|
1.Connect the M.U.T.-III to
the diagnosis connector to check for date list item No.
16.
2.Start the engine, and warm up the
engine.
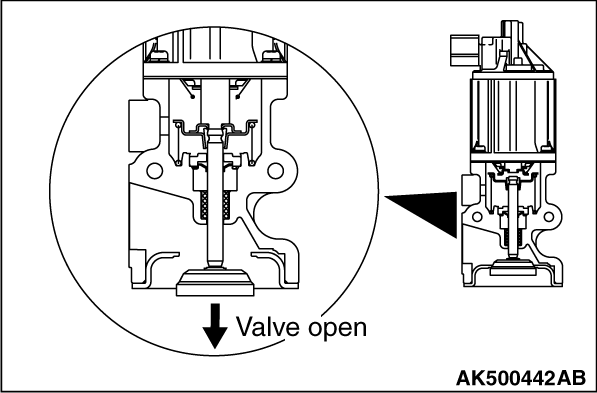
3.Raise the engine speed gradually, and
make sure that the valve open degree changes
from 0 % to 100 %.
|

|
1.Remove the exhaust gas
recirculation valve.
|

|
2.Connect the terminal
(+) of the sensor power supply (5 V) with the terminal
No.
3 of the exhaust gas recirculation valve connector, and
connect the terminal (-) of
the sensor power supply (5 V) with the terminal No.
2.
3.A tester is to be connected between the
terminal No.1 and No. 2.
4.Connect the terminal
(+) of the power supply with the terminal No. 6 of the
exhaust gas recirculation valve connector, and connect the
terminal (-) of the power supply
with the terminal No. 4. Confirm the exhaust gas
recirculation valve is opened.
| note |
At this time, the power supply
voltage is to be 5 V. When the valve is not
opened, increase the
voltage 1 V by 1 V. For each voltage, current is
to be applied within 5 seconds. Once the valve
is opened, the voltage is not to be increased
any more.
|
|
|
5.Confirm the voltage is
changed between the terminal No. 1 and No. 2 together with
the
exhaust gas recirculation valve opening
movement.
6.By the voltage changed, the DC is
recognized as being normal.
7.Use a new gasket and
tighten the installation bolt to the tightening
torque.
Tightening torque: 48 ± 6
N·m
|
|
|
1.
| caution |
Do not use a solvent or
detergent, which could enter
the motor and cause it to malfunction.
|
Remove the exhaust gas recirculation valve and check
that the exhaust gas recirculation
valve is not stuck or clogged with carbon deposits. Use a
wire brush to clean the valve if necessary.
|
|
|
2.Using a new gasket,
install the exhaust gas recirculation valve by tightening
its
mounting bolts to the specified
torque.
Tightening torque: 48 ± 6
N·m
|